Exercise
Pilates Reformer Exercises for a Healthier You
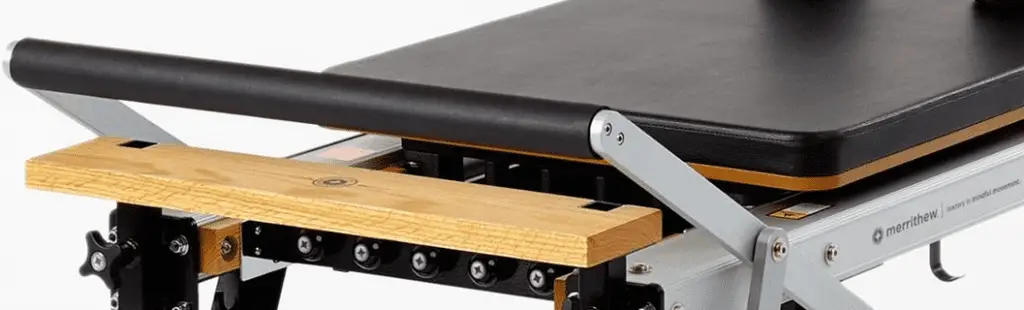
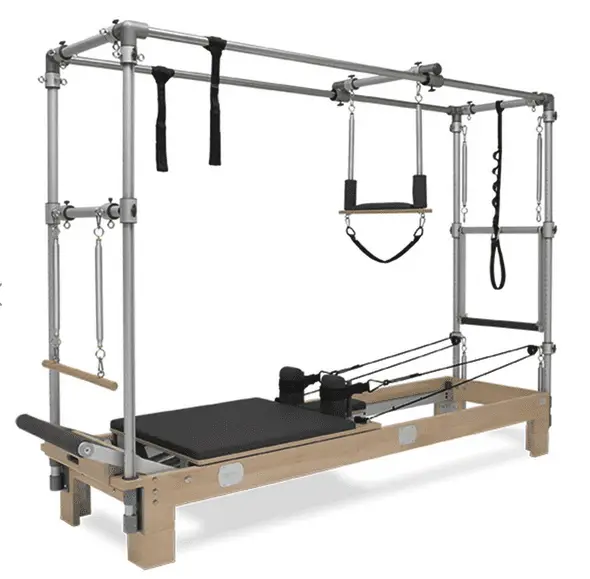
The term reformer Pilates may be giving you some serious 80’s revival vibes, but according to fashion and the copious amounts of tie dye out there, the 80’s is back in a big way, and so is the reformer. If you’ve never seen one before, it can be an intimidating looking piece of equipment, but it is a popular tool for a reason. The Pilates reformer helps the user to maintain proper alignment and form with the added benefit of resistance provided by the springs and bands that are integral parts of the machine.
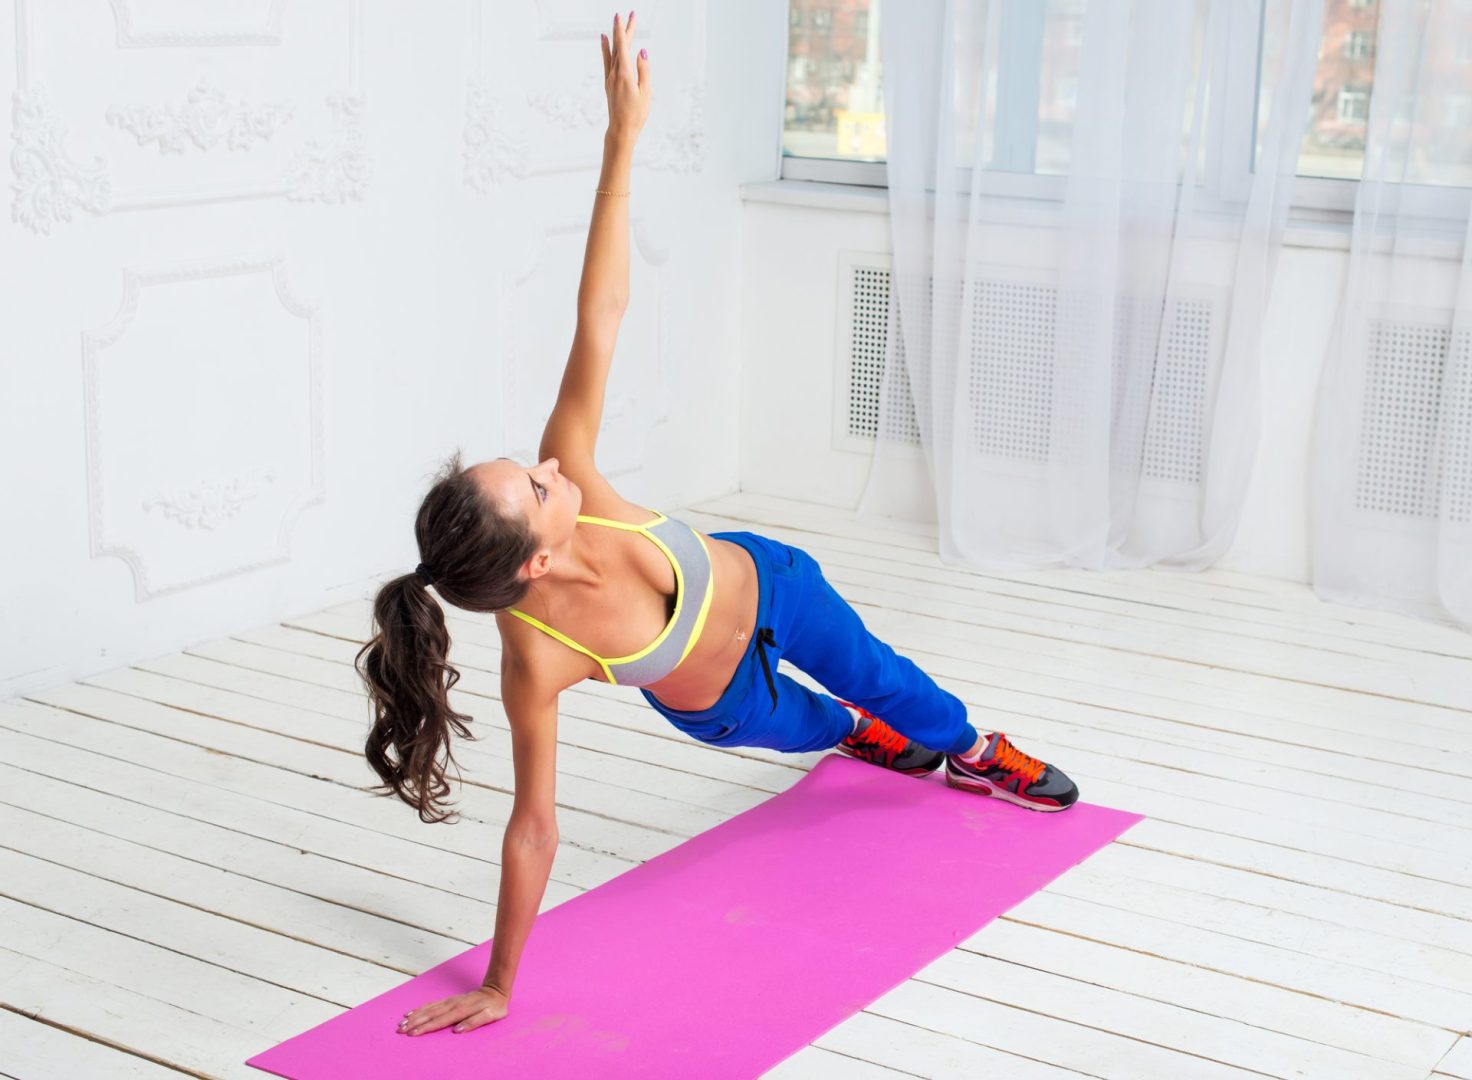
The entire body gets an amazing low impact workout during reformer Pilates and I’ll be going over a few of my favourites for each part of the body below.
The Body’s Powerhouse – The Core
Pilates centers on the idea that all movement comes from your core and so creating a strong stable core by strengthening the muscles directly surrounding the core is essential to every kind of Pilates practice. The core is where all explosive strength originates and a strong core reduces back and hip pain, which is a side effect of modern life, which sadly sees us sitting for longer and longer periods of time.
Kneeling Abdominals
This exercise is the answer if you have trouble with neck strain while doing many of the crunch based ab exercises that are touted in gyms and all over the web. The exercise also utilized resistance, so you can really feel your abs working.
- To begin, get onto your hands and knees on the base of the reformer with your knees up against the shoulder rests and your hands in front of you on the reformer track.
- Engage your core and exhale as you pull your knees in towards your hands. Your arms will work to keep you stable, but try not to use them to pull the carriage towards your hands, your abdominals should be the focus here.
You can use either a flat or rounded back for this exercise as either position does not pose a risk to the spine. You can also try twisting your upper body to activate the obliques, just make sure to keep the hips square in the process.
Reverse Crunches
This exercise targets the hard to reach lower abdominals that are so important and yet difficult to hit. As with the last exercise resistance is being enlisted here with the straps increasing the effectiveness of the maneuver.
- To get started, Slip the straps over your feet and then slide them up around your thighs.
- Lie down on your back in a crunch position on the long box with knees bent and feet lifted off the base. The head is raised, so use your arms to support your neck, but make sure not to pull.
- Draw your knees in towards your nose using your abdominal muscles to do the brunt of the work.
For an added challenge twist to the side as you pull your knees in towards your chest to activate the obliques. Remember to keep those shoulders down and try to keep the tension out of your neck.
Your Driving Force – The Legs
Our legs carry the weight of our bodies through every day of our lives, but many people prefer to focus on training their upper body instead. Strong legs make sure that we can keep moving and doing the activities we enjoy long into our golden years. The exercises listed below are both on the low impact side so there’s no reason to skip leg day.
Jump Board Jumps
Jumping is an explosive action that has many people cringing and holding their knees, but this exercise is performed lying down on the moving base of the reformer. If performed properly, these are quite low impact.
- To begin, lay on your back on the base of the reformer with your shoulders pressed into the shoulder rests and your feet flat against the jump board.
- Bend your knees slightly and then press away from the board as you would when performing a standing jump. Remember to engage your core and your glutes.
- To avoid any high impact to your feet and joints, you’ll want the balls of your feet to connect first with the jump board and then roll back onto your heels. Letting your knees bend as you reconnect with the board will help to lessen the impact as well.
Once you get confident with this move, you can try changing leg positions while you are in the “air” Try opening and closing the legs in a v shape to work the inner thighs.
Feet in the Straps
While the above exercise focuses more on strengthening the quads, this maneuver targets the hamstrings. Part of Pilates is focusing on balanced muscles so that no one side is stronger or more flexible than the other.
- To perform the exercise, lay on your back on the base of the reformer with your shoulders pressed into the shoulder rests. Legs should be fully extended and both feet in the straps just forward of the arch.
- With your core and glutes engaged slowly lift and lower your legs while pressing against the resistance in the straps. You’ll notice a really nice stretch in the hamstrings when lifting your legs.
Make sure to really engage your core in order to keep your lower back glued to the base of the reformer. If you want to work the inner thighs during this exercise you can place a ball or another object between your ankles and squeeze it to activate those muscles.
Lifting You up Every day – The Arms
Think about your daily routine, how often do you use your hands and arms? When you stop to think about it, there really aren’t many activities that don’t require the use of our upper limbs. Pilates on the mat has some exercises to target the arms, but unless you are using weight, the reformer allows you to target and tone the arms much better through the resistance of the reformers cables.
Chest Expansion
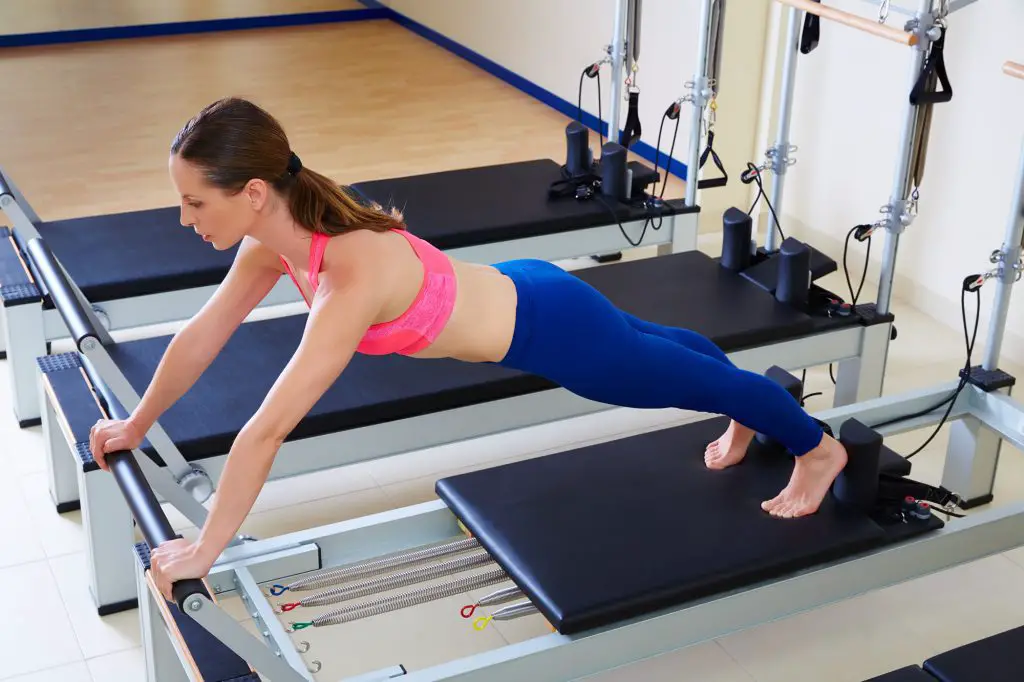
Like the name says, this exercise works to open up those tight chest muscles, but isn’t the main reason I’ve included it. This exercise targets the back of the upper arms, which are notoriously hard to hit and a subject of anxiety for many ladies.
- Begin by kneeling on the padded base of the reformer facing the shoulder supports. Take the straps in your hands and with palms facing behind you, extend your arms fully at your sides.
- With the core engaged and the shoulder blades pulled down your back, slowly press your hands back against the straps. Think about pressing back through the shoulders to activate the back as well.
Kneeling on the padded reformer base makes this move a lot more comfortable for anyone who may have sore knees than trying to perform this move on a yoga mat. You’ll find that going slowly helps you to maintain balance and maintain proper alignment which is the main goal of the reformer.
Bicep Curls
As mentioned, a large part of Pilates is creating balance in the muscles of our bodies. This exercise compliments the last maneuver by working the shoulders and the front of the upper arms, the biceps.
- To begin you’ll once again take a kneeling position facing the shoulder rests on the base of the reformer. Take hold of the straps holding the loops with palms facing up and arms down at your sides.
- Lean just slightly back until you feel your quads engage. Keeping the elbows at about shoulder height, curl and uncurl the upper arms. If you feel strain in your neck, try lowering your elbows just a little.
This may seem like a pretty standard exercises but performing this movement in a kneeling position while tilting back just a bit gives you the added benefit of activating your quads and abdominals. Just make sure to keep a straight back while performing the movement.
Keeping Your Head Held High – The Back
There aren’t many people out there who haven’t experienced back pain, and unfortunately many people suffer from chronic back pain. As our society has slowly but surely moved towards a more and more sedentary lifestyle our posture, and as an effect of that, our backs have suffered greatly. Luckily, many Pilates exercises can help to strengthen the back while at the same time helping relieve back pain caused by weak and sore muscles. Performing exercises specific to releasing tired back muscles paired with movements designed to strengthen the core will go a long way towards a healthier, less injury prone upper body.
If you’re experiencing back pain, you may find these exercises very helpful. Just be sure to check with your doctor and work with a professional if you are unsure or have a specific injury.
Pelvic tilt on the Reformer
This exercise can be performed on the mat as well, but having the foot rest to raise the feet and the cushioning of the reformer may help someone with lower back pain feel more comfortable.
- To begin, lie on your back with your shoulders against the shoulder rests and put the soles of your feet on the foot rest. Feet should be at about hip width apart with knees bent.
- Tilt your pelvis towards your chest by engaging your abdominal muscles and pulling your belly button into the base of the reformer as well as rolling your tailbone under your seat. Relax back to the starting pose and then repeat.
It helps to think of having a bowl of water between your hips and you want to tip the water out of the bowl onto your upper stomach. This is a gentle exercise but can be very effective for relieving and at the same time strengthening the lower back.
Spine stretch
This exercise is non-traditional in the way that the reformer is used, but it is wonderful for teaching a person articulation of the spine in a truly segmented fashion which is important to completing other more advanced articulation movements properly and without injury.
- Place a mat under the reformer to sit on and take a seat in the “well” of the machine. Your back will be up against the inside edge of the foot rest with legs extended out in front of you. Make sure you are seated on your sitz bones and stay on them.
- Sit up tall and hold the handles behind the shoulder rests with arms extended in front of you. Slowly let the chin sink down as far as you can while staying on the sitz bones. Let the movement of the carriage provide gentle traction as you uncurl the spine to sit back up.
The support provided by the reformer allows for pausing during the movement without any strain. This way you can really concentrate on feeling the movement in your spine as you roll down and forward. The abdominals are still kept engaged but are not supporting your upper body as heavily as they would on the mat.
Getting Started with Reformer Pilates
There are over 500 moves and variations that can be performed on the reformer and a Pilates coach can work with you to build a routine to meet your specific needs, or you can attend a group class to get an all over workout. From the small sample of exercises above, it’s easy to see that Pilates on the reformer is a great way to work the entire body without stressing your joints. Taking a couple of private lessons on the reformer may be a good idea to make sure you understand how the equipment works. Some people prefer to start with Pilates on a mat to learn the mechanics and movements before moving to the reformer, but there are just as many people who like the support that a reformer offers so that you can build up your core strength without straining your back. Either approach will get you started on a path to a healthier body and lifestyle.